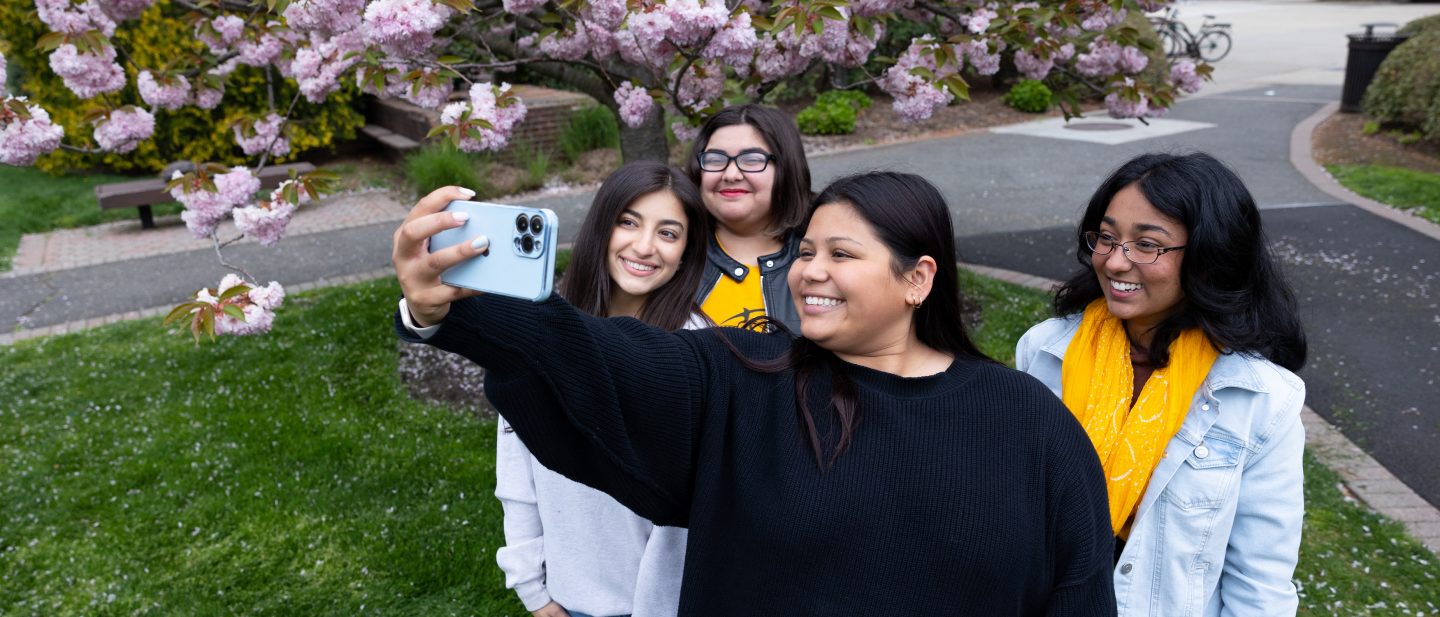
January 31, 2010 - by Jennifer Derri
Here it is! My attempt at the delicious Greek feta and spinach pie! This very authentic recipe was sent to me by Professor Janice Steil, who in turn received it from her son who was at one time working in Greece. She mentioned it has become a family holiday staple. I can understand why! I was inspired to make this after someone brought the triangle hors d’oeuvre versions to our class celebration last December, but didn’t get around to it until now. This is the larger pie version, and it is perfect for a delicious brunch, lunch, or early dinner.
Sotiris's Spanikopita
- Olive oil
- 2 red onions, diced
- 1 bunch dill, chopped
- 2 bags spinach, chopped
- 1.5 lbs feta, crumbled
- 2 eggs, beaten
- Fresh ground black pepper
- Phyllo dough (I used 1 roll)
Thaw phyllo dough as directed on package. Preheat oven to 350 degrees.
Heat oil over medium heat. Sauté onion until translucent, about 3 minutes, then add spinach and dill. Stir until spinach is cooked, and remove from heat.
In a medium bowl, beat eggs. Stir in feta, then onion, spinach and dill. Grind in freshblack pepper.
Coat a baking dish with olive oil, and layer 2 sheets of phyllo dough. Brush with olive oil, and layer with spinach and feta mixture. Add another two sheets of dough, brush with olive oil, and layer with spinach and feta. Continue making layers until all spinach and feta mixture is used. Top with remaining sheets of phyllo and brush with olive oil.
Bake until top is golden brown, about 45 minutes. Cut into squares and serve.
Tips from a student cook…
I found phyllo dough (after asking for directions) in the freezer section of my local Pathmark, next to frozen pie crusts and other desserts. It came in a pack of two rolls for about five dollars.
I read some tips online about using phyllo dough, and apparently it can dry out pretty quickly. The thaw time is about two hours, but make sure to keep it wrapped throughout this time. When you ready to start layering, unroll the dough on a clean surface, and immediately cover it with plastic wrap and a clean, damp cloth. Uncover, remove sheets, and recover as you work. Honestly, I got lazy and forgot to be recovering, and I lost a few dried out sheets as a result!
I bought the feta in the deli section of the grocery in a large block. It was much less expensive than the already crumbled feta. I love the dill in this recipe! I never would have guessed. I bought only one bunch of spinach, but I would recommend at least two because it really cooks down fast. I also used only about a pound of feta, so it balanced out, but my pie turned out pretty thin because I didn’t have as much spinach and feta mixture. This is also probably why I only used one roll of phyllo dough. I will be making a second attempt of course with my second roll!
January 17, 2010 - by Jennifer Derri
This shrimp will shock your tastebuds with its amazing flavor! I found this recipe at Budget Bytes, a blog I have absolutely fallen in love with! The author demonstrates how you can eat well and save money by cooking at home. I made several additions and one major change to the recipe, and that was to use frozen shrimp, since, with no sales at the fish market, it was considerably cheaper. I served the shrimp over rice steamed in coconut milk and a side of steamed broccoli rabe.
-
1 lb bag frozen cooked shrimp, peeled and deveined
-
2 teaspoons dried rosemary
-
1 teaspoon dried oregano
-
1 teaspoon crushed red pepper flakes
-
1 teaspoon paprika
-
1 teaspoon whole black peppercorns
-
1 teaspoon salt
-
2 tablespoons olive oil
-
2 tablespoons butter
-
1 small onion
-
4 cloves garlic, minced
-
1 cup mushrooms, sliced
-
½ cup light beer
Place shrimp in a strainer and place under cold running water to thaw for 1-2 minutes. Set aside.
Combine rosemary, oregano, crushed red pepper, paprika, peppercorns and salt in a small food processor, coffee grinder, or blender and grind to a powder.
In large skillet, melt butter with olive oil over medium heat. Add onions and garlic, and sauté until fragrant. Add ground spice mixture. Stir and cook for 1-2 minutes.
Increase heat to medium-high. Add shrimp, stir and cook until shrimp is cooked through, about 10 minutes. Using a slotted spoon, remove shrimp from skillet and set aside.
Add mushrooms to pan juices, and cook until tender, about 5 minutes. Add beer and simmer until reduced by half. Add shrimp back to pan to warm through. Serve over a bed of rice.
Tips from a student cook…
I have a peppercorn grinder, so instead of grinding the spices in my blender, I just combined the dried spices and ground in some pepper. I didn’t consider that rosemary, oregano, and crushed red pepper are also spices that are not quite powdered. The dish still tasted wonderful, but I will not skip the crucial step of grinding the spices again. Because I substituted frozen shrimp, I think I had considerably more pan juices. The original recipe calls for ½ cup chicken broth in addition to the beer, but I omitted the broth so that the sauce didn’t get too thin. I used Miller Genuine Draft light beer, and I was really impressed with the depth of flavor the beer added to the dish, perfectly complimenting the spices. Don’t skip that step either!
January 08, 2010 - by Jennifer Derri
As soon as the weather starts getting cold, my mom always prepares a large batch of homemade hot cocoa to keep us warm through winter. She kept it in a large tin that was designed with a scenic picture of a small town whose frozen lake was serving as an ice skating rink. There was a Christmas tree in the town square, an old couple sitting on a bench watching the passersby, a skating couple holding hands, a police officer on skates chasing little boys who no doubt were up to no good, smoking chimneys on the rooftops and warm lights in the windows of every home … A classic small town winter scene, and it was always so comforting to sit with a warm mug in my hands, sipping this sweet drink, and dreaming of this sleepy, care free little town. I always made mine extra sweet.
Now I am living far away from my mom, and my hometown in the Midwestern suburbs, but this homemade hot cocoa is still rather comforting and definitely helping me stay warm in this cold winter weather. I heard this weekend is supposed to be “arctic.” Brr…
I made a smaller batch than my mom usually makes using quantities I found readily available in the supermarket. It’s not exactly equivalent, but still tastes perfect! I included a recipe for both a large and small batch here. The ingredients are a bit expensive, but don’t worry, the mix will surely last you all winter!
Large batch:
- 8 quarts powdered milk
- 16 ounces Nesquick chocolate
- 8 ounces non-dairy creamer
- 2/3 cup sugar
Small batch:
- 3 quarts powdered milk
- 10.9 ounces Nesquick chocolate
- 4 ounces non-dairy creamer
- 1/3 cup sugar
Mix all ingredients in a large airtight container. Try closing the lid tightly and shaking it up! Combine 2-3 tablespoons hot cocoa to 1 cup hot water. Don't forget the marshmellows.
Tips from a student cook…
Last weekend, I met some friends in Norwalk, Connecticut, where we dined at Chocopologie, a café by Knipschildt Chocolatier. Everything was absolutely delicious, especially their hot chocolate, made from real cocoa beans. Mmm! They also offer spicy hot chocolate, which is spiced with chipotle, ginger, cinnamon, and cloves. I tried adding a dash of ginger, cinnamon, and cayenne pepper to a cup of my own homemade hot cocoa, and I was not displeased. The cinnamon aroma was to die for! So if you are looking for a pick me up, in addition to a warm me up, try adding a dash or so of these spices!
December 31, 2009 - by Jennifer Derri
Happy New Year! I am looking forward to many culinary discoveries and inspirations in the new decade, and certainly this calls for celebration! I will be heading over to a good friends house for dinner this evening, but the dish I am posting today would also be great for a dinner party. The flavor of this vodka sauce, made with sour cream, is fantastic, and it is very easy to prepare. I surprised myself one evening last week, when I wasn’t feeling particularly inspired to cook, with the discovery that I had all the ingredients for this delicious dish! The base of the recipe comes from The Food Network. We enjoyed it with a large salad, but if I had the ingredients, I might have added in some vegetables (a saute of yellow grape tomatoes and artichoke hearts comes to mind...) to balance the carbs in the pasta!
- 1 teaspoon olive oil
- 1 small onion, finely chopped
- 2 cloves garlic, minced
- 1 ½ cups tomato sauce
- Basil, oregano, salt, black pepper
- ½ cup vodka
- ½ cup sour cream
- ½ lb capellini pasta
Prepare pasta according to package directions.
Heat olive oil over medium heat in saucepan. Sauté onion and garlic until translucent. Add vodka and heat for 1-2 minutes to burn off alcohol. Add tomato sauce, and bring to a simmer. Add seasonings to taste. Combine sauce with sour cream, and let simmer 2-3 minutes to combine flavors. Serve over capellini.
Tips from student cook…
Capellini is like a very thin spaghetti, and it cooks in only 5 minutes. Perfect for a day I didn’t want to be standing over the stove. I used only half a box in this recipe, and this was enough for two hearty servings and a little extra for my lunch the next day.
The Food Network recipe says, “heat vodka and flame.” I had this vision of my little kitchen going up in flames, while I stood outside, cold and hungry… so I decided against trying this culinary technique in an apartment crammed with flammable objects. But if you are feeling a little FLAMbuoyant (haha), I found a good cautionary description of how to do so at Cooking with Vodka, written by the author of The Vodka Cookbook. Let me know how it goes!
December 18, 2009 - by Jennifer Derri
I made these for an end-of-the-year celebration for one of my classes. Everyone in the class brought something to share, and there are a few new recipes I am planning to try as a result! I found the recipe for this Kringle at Allrecipes.com, a site I haven’t visited lately, but as always, it is a reliable go-to source! I pretty much followed the recipe, except substituted the brown sugar filling for pie filling, as was suggested in a comment by one of the users on the site. The recipe makes three pastries, so I also took some to share at work. For my first try at this type of pastry, these turned out pretty good!
- 1 cup butter
- 2 cups sifted all-purpose flour
- 1 cup sour cream
- 1 can cherry pie filling
- 1 cup confectioners' sugar
- 2 tablespoons water
In a large bowl, cut butter into flour until crumbly. Stir in sour cream, and mix well. Form dough into a ball. Cover tightly, and refrigerate overnight or at least 8 hours.
Preheat oven to 375 degrees. Lightly grease a baking sheet.
Divide dough into three equal parts, and return two parts to the refrigerator to keep cold. Quickly form one third of the dough into a rectangle, and flour lightly. On a heavily floured surface, roll out the dough to approximately 12 x 17 inches. Position lengthwise on the work surface. Along the long edges of the dough rectangle, use a sharp knife to cut 4 inch long angled lines about 1/2 inch apart.
Spoon one third of the filling along the length of the rectangle's uncut center. Alternating from one side of the dough to the other, fold each 1/2 inch wide strip towards the center, crisscrossing the filling in a braid-like fashion. Lightly press together the ends of the strips to seal. Repeat with remaining ingredients to form three braided danishes, and arrange on prepared baking sheet.
Bake for 30 minutes in the preheated oven, or until golden brown. Cool for approximately 30 minutes. While the danishes are cooling, prepare the icing by mixing the confectioners sugar and water until smooth. Drizzle in fine streams over warm danishes.
Tips from a student cook…
It is very important to use a heavily floured work surface because the dough can get sticky, especially when rolling it out. Be persistent with the rolling and try to keep the edges uniform. This will make the braiding easy. For the filling, I wasn’t sure how much to use, and I think I used too much. I first tried using one entire can of apple pie filling on one Danish, and I could tell as soon as I tried to start braiding and the filling was oozing out that this was too much. So then I divided one can of cherry pie filling between the two remaining Danishes, but I still think this was too much. I would stick to using only one can of filling and dividing it equally between the three Danishes. This will make the pastries much less messy as well as make sure the filling doesn’t overwhelm the pastry dough, which comes out flaky and delicious!
Here are a few of the cooks from my class whose recipes I hope to try soon...
December 13, 2009 - by Jennifer Derri
Have you ever noticed the recipe on the side of a box? I came across a blog called Cooking on the Side, where the author blogs about recipes she’s discovered on packages of popular grocery items! This made me start being more curious about my grocery items’ packaging, and when I decided last week that I wanted to try stuffed shells, I checked the box of Barilla Jumbo Shells first.
For a long time, I’ve been wary of an Italian recipe like this because of the dreaded cost of Ricotta. Surprisingly, Barilla made no mention of it. I did a web search just to confirm this omission was acceptable, and sure enough I found an “I Hate Ricotta” stuffed shells recipe at Epicurious. I proceeded mostly with the package recipe, which surprisingly revealed an interesting secret ingredient (nutmeg!), but I wish I would have added the red wine to the sauce as directed from the online recipe. I used ground chicken instead of beef. I also didn’t have spinach, and this meant I ended up with several unstuffed shells because my filling didn’t go far enough, but overall the combined recipe I have below is really superb!
- 1 (12 oz) box jumbo pasta shells
- 1 medium onion, diced
- 2 cloves garlic, chopped
- 1 lb ground beef (or chicken or turkey)
- 1 teaspoon salt
- ¼ teaspoon black pepper
- 1/8 teaspoon nutmeg
- 1/2 cup Italian style breadcrumbs
- 1/4 cup fresh spinach, chopped
- 1 egg, beaten
- 1 (8 oz) package mozzarella cheese, shredded
- 1 (26 oz) jar of pasta sauce
- 1/3 cup dry red wine
Prepare pasta according to package directions, drain, and cool.
In a large skillet, sauté onion and garlic until translucent, about 5 minutes. Add meat, and cook until no longer pink throughout. Season with salt, pepper, and nutmeg. Drain and cool for about 5 minutes.
In a large bowl, combine meat, breadcrumbs, spinach, egg, and all but ¼ cup of cheese.
Preheat oven to 400 degrees.
Cover bottom of a 13 x 9 inch casserole dish, or two medium pie pans, with sauce. Stuff shells with the meat mixture and place on top of sauce in dish.
Add red wine to remaining sauce and mix well. Cover shells with sauce and top with remaining cheese. Bake for 25 to 30 minutes..
Tips from a student cook…
I nearly forgot about the pasta while I was preparing the other ingredients, so the shells overcooked by a few minutes. This meant I had kind of pasty pasta, but it wasn’t too bad. I was surprised I actually did use the entire jar of sauce, so adding the red wine would have helped it go a little farther, and I think it also would have thinned out the sauce so it didn’t get so lumpy during the baking.
Barilla had about 34 shells in one box. That’s a whole lot of pasta, so I knew right away that I was going to have lots of leftovers. To make the leftovers easier to store, I decided to divide the shells between two medium pie pans. Fifteen fit in each so it was just about perfect! If you’re not feeding an army, you might want to try cutting the recipe in half, but rather than figure out the measurements, I just planned on having a repeat dinner the next night. Luckily, these were delicious enough for me to want them three nights in a row, and for lunch the next day too!
December 04, 2009 - by Jennifer Derri
What better to do with leftover Thanksgiving turkey than prepare a soup? This is hands down the best leftover turkey recipe I have ever encountered, perhaps because its hot curry flavor is such a contrast to the traditional Thanksgiving feast!
This recipe comes from the Williams Sonoma Food Made Easy Soup cookbook, which I received nearly two years ago from my aunt as a wedding gift. I absolutely love soup, so this is definitely the cookbook for me, especially because the recipes are designed to be quick, easy for a novice cook, and are accompanied by beautiful photos, which I borrowed here because I forgot to take a picture of my own creation! I substituted fresh turkey breast for a few pieces of turkey leftover from our Thanksgiving roast. I’ve written the recipe in its original form and described how I worked with the leftovers in the tips below.
- 3 tablespoons unsalted butter
- 1 ½ lbs boneless, skinless turkey breast, cut to bite-size pieces
- 1 medium yellow onion, finely chopped
- 3 stalks celery, finely chopped
- 2 medium carrots, finely chopped
- 1 clove garlic, minced
- 1 tablespoon curry powder
- 1 teaspoon cayenne pepper
- 4 cups chicken broth
- ½ cup long-grain white rice
- 1 cup plain yogurt
- Salt and freshly ground pepper
In a large stockpot, melt butter over medium heat. Add the turkey and sauté until lightly browned on all sides, about 7 minutes. Transfer turkey to a plate and set aside.
Add onion, celery, carrots, and garlic, and sauté until onion is translucent, about 7 minutes. Stir in curry and cayenne, stirring, for 2 to 3 minutes to blend flavors.
Add broth and turkey to stockpot, and bring to a simmer over high heat. Reduce heat to medium, add the rice, and cook, uncovered, until the rice is tender and the turkey is cooked through, about 15 to 20 minutes.
Stir in yogurt, and simmer over medium heat for 10 minutes to incorporate. Season to taste with salt and pepper.
Tips from a student cook…
I selected a few different bone-in pieces from the turkey to use in this soup, including a breast, a leg, and some other part for which I don’t know the name, but I chose mostly white meat. I put the turkey pieces in the large stockpot, and added 2 cups of broth and 2 cups of water. I allowed the turkey to simmer in the broth while I sautéed and seasoned the onion, celery, carrots, and garlic separately in 1 tablespoon of olive oil in a large skillet. I removed the turkey pieces, deboned them, cut them bite-size pieces, and added them back to the broth in the stockpot with the vegetables. Then I continued with the recipe as written. I was really happy with the results, and I think perhaps because I simmered the bone-in turkey pieces first, the broth was really flavorful, even though I substituted 2 cups of water!
I think the presentation of this soup was also really helped by some meticulousness with chopping the vegetables. They wrote finely chopped, so I made sure to do a fine job of chopping. Because the vegetable pieces were small, the turkey really came out as the star of this soup.
Actually, I think I added a little more turkey than the recipe calls for, so I decided not to add the rice directly into the soup because I wanted there to be enough broth. I did serve rice on the side though! It turned out to be a delicious and hearty meal. I really recommend this recipe for the day after Thanksgiving, as well as any other day of the year!
December 02, 2009 - by Jennifer Derri
Hello, I am this week's guest blogger, Julie, the third Wesp daughter and grad student in California. Since my little sister started this blog I continually check it for some quick and delicious recipes and today I wanted to share one. My family has brought this dish to parties as an appetizer for many years, but it's also an easy, healthy snack! With the holiday season coming up, I have an endless list of department and lab parties to attend and decided to bring this veggie pizza with me to spread the (delicious) holiday cheer!
- 2 cans (8 oz each) Pillsbury refrigerated crescent dinner rolls
- 1 package (8 oz) cream cheese, softened
- 1/2 cup sour cream
- 1 teaspoon dried dill weed
- 1/8 teaspoon garlic powder
- 3 cups finely chopped assorted vegetables (bell peppers, broccoli, carrot, cucumber and/or green onions)
Heat oven to 375°F. Remove dough from cans in rolled sections; do not unroll. Cut each section into 8 slices (16 slices from each can).
Place slices, cut side down, on ungreased cookie sheets to form trees. To form each tree, start by placing 1 slice for top; arrange 2 slices just below, with sides touching. Continue arranging row of 3 slices, then row of 4 slices, ending with row of 5 slices. Use remaining slice for trunk. Refrigerate one tree while the other bakes.
Bake one tree 11 to 13 minutes or until golden brown. Cool 1 minute; carefully loosen with pancake turner and slide onto cooling rack to cool. Bake and cool second tree.
Place each tree on serving platter. In small bowl, mix cream cheese, sour cream, dill and garlic powder; blend until smooth. Spread mixture over both trees. Decorate trees with assorted vegetable pieces. Refrigerate until serving time. To serve, pull apart slices of tree.
Tips from a student cook...
I really enjoy the dill and garlic flavor in the spread so I ended up adding more than the suggested amount in the recipe. Be creative with the veggies! My favorite part of cooking is the presentation, plus I think food that looks appetizing always tastes better (but Jen is the psychology expert not me!) and you will receive lots of compliments on this tasty tree-t!
November 21, 2009 - by Jennifer Derri
These little babies are going to the make your salad special. I can’t remember where I saw this idea, perhaps in a magazine. It was a while back though, and I just remembered the idea the other evening when I couldn’t get rid of a salad craving. I tossed fresh Romaine lettuce with cucumbers, cherry tomatoes, and grilled chicken. These croutons topped off the light meal perfectly!
A salad is an easy solution to a late night dinner, and yes, I did have a few more of those last week. I haven’t been waking up to cook (mostly because I have been waking up to study instead), but I think the prospect of being an early morning chef has made me do more planning. Just thinking ahead in the morning what I might cook in the evening reminds me to take out meat from the freezer or stop at the store before coming home for an extra ingredient. At least we still didn’t eat out at all last week!
- 2 slices white bread
- 2 slices cheddar cheese
- ½ tablespoon butter
- A pinch of dried parsley
Butter one side of the each slice of bread, and place cheese between non-buttered sides to make a sandwich. Sprinkle parsley over buttered sides.
Place sandwich in frying pan over medium heat. Brown each side to melt cheese.
Let sandwich cool for about 2 minutes. Cut sandwich to small crouton squares. Serve with your favorite salad or soup!
Tips from a student cook…
The parsley was my idea. I’m not really sure what croutons are usually spiced with, but the parsley really added a lot of flavor! Next time, I might also try fresh ground black pepper. Letting the sandwich is essential, otherwise the hot cheese will keeping gluing your little croutons back together. Grilled cheese has always been a favorite of mine, and I have made sandwiches with a great variety of different cheeses. Some forthcoming crouton ideas may be prosciutto mozzarella, ham and Swiss, or maybe even feta garlic… Yum!
Stay tuned for Thanksgiving…
November 15, 2009 - by Jennifer Derri
Well, signing up for that experiment last week was both exhausting and exhilirating!
Overall, cooking in the morning has been tested to be valid hypothesis! We actually had food to eat all week, and not once did we order out. I felt very organized and well-prepared for my day after waking up early enough to have time to contemplate it.
By this weekend though, I have run out of steam. I’m not sure if I can replicate the results this week… I have no idea what I am going to cook tomorrow, for example. Yesterday’s compulsory trip to the grocery store was pretty futile. I went without any recipe ideas in my head, so I will probably end up having half the ingredients for one recipe and half for another. Nevertheless, I am going still going to try my best this week! Perhaps after writing this post, I will take a few minutes to plan out a menu.
I did do some impromptu things last week, in addition to the things I had planned. Here’s how the experiment played out!
Experiment Day 1: Monday
I woke up at 6:00 am without groaning. I guess I was looking forward to my first attempt at this cooking in the morning thing. I combined ideas from recipes by Emeril Lagasse and Life’s Ambrosia.
Lentil Rice Pilaf with Kielbasa
- 1 tablespoon olive oil
- 1 tablespoon butter
- 1 medium onion, chopped
- 3 cloves garlic, minced
- 1 ½ cups rice
- ¾ cup lentil beans
- 3 cups chicken broth
- 1 teaspoon olive oil
- 1 pound fresh kielbasa, sliced to rounds
- ½ cup red pepper, diced
In large saucepan, heat olive oil and butter over medium heat. Sauté onion and garlic until translucent, about 2 minutes. Add rice and lentils, and sauté for about 4 minutes. Add chicken broth, bring to a boil, then reduce heat, and simmer for 20 to 25 minutes, until rice and lentils are cooked.
Meanwhile, heat remaining olive oil in large frying pan. Add red pepper and kielbasa. Brown sausage for about 10 minutes until cooked through. Serve with lentil rice pilaf.
Discussion:
I don’t think I let the rice and lentils fry long enough before adding the chicken broth. I added more broth in the middle because it seemed like the lentils weren’t cooking as fast as the rice, but this caused the rice to overcook.
Results:
Not too bad in the end. When I get home from work, the rice didn’t seem as mushy after sitting all day. The pilaf had a lot of flavor and was very filling, as hoped, with the addition of lentils. The kielbasa was the perfect pairing! I left out the mushrooms that had been included in both original recipes, and I think maybe next time I will add them in because they might have added a nice texture.
Experiment Day 2: Tuesday
Well, I kind of cheated and skipped a day of cooking dinner in the morning. We had leftover rice pilaf, so I decided to wait until Wednesday to cook a new dish. I did wake up early enough to make myself a good breakfast though!
My husband brought home persimmon (fuyu) fruit, which I had never seen before in my life. I was a little skeptical about trying it until completing a Google search, but then I discovered a great oatmeal idea at White on Rice Couple for Cinnamon Persimmon Oatmeal. That was good breakfast!
Experiment Day 3: Wednesday
Tuesday’s skip day kind of through me out of sync. I didn’t really feel like getting up early Wednesday morning. I was thinking of making Butternut Squash Stuffed Shells, and I think I was a little intimidated by the recipe. Plus, one of my classes was cancelled that evening so I knew I would be getting home early.
Unfortunately, that evening my dinner plans were completely squashed. My oven wouldn’t heat up and so I couldn’t roast my butternut squash. I also didn’t have any ricotta cheese because it was too expensive, and I was just going to try to leave it out of the recipe, but then I realized stuffed shells wouldn’t be the same with mozzarella.
So I ended up steaming my butternut squash with a little but of garlic and green beans and serving it with pan friend chicken cutlets. It actually wasn’t a bad dinner, but it was a frustrating evening, which I should have spent at the library instead. That’s what I get for not sticking to the experiment, I guess.
Experiment Day 4: Thursday
I got back on track Thursday morning. The prior evening, I had even chopped up some of my ingredients. I combined ideas for this recipe from First Look, Then Cook and Eclectic Cook.
Chicken Curry
- 1 teaspoon curry powder
- 1 teaspoon cumin
- 1/2 teaspoon salt
- 1/2 teaspoon black pepper
- 1/2 teaspoon cayenne pepper
- 1 1/2 teaspoons olive oil
- 1 lb boneless, skinless chicken breast, cut into 1-inch pieces
- 1 medium red onion, diced
- 3 cloves garlic, minced
- 1 1/2 teaspoons fresh ginger, minced
- 1 large tomato, diced
- ¾ cup coconut milk
- 1 bay leaf
- 1 tablespoon fresh lemon juice
In a small bowl, combine curry powder, cumin, salt, black pepper, and cayenne.
In large sauce pan, heat oil over medium heat. Add chicken, and brown on all sides, about 7 minutes. Remove chicken from pan.
Add onion to pan, and sauté until translucent, about 5 minutes. Add garlic and ginger, and cook until fragrant, about 1 minute. Add chicken back to pan. Season chicken with spice mixture.
Stir in diced tomato and coconut milk, and add bay leaf. Reduce heat, cover, and let simmer until sauce is thickened, about 30 minutes. Stir in lemon juice, and serve over jasmine rice.
Discussion:
I liked the thickness of this sauce, and the flavor was amazing! But I think it would have been better if there was less chicken and more sauce. Next time, I might add a little more coconut milk, and if the problem was that the sauce was absorbed during the day, I will add more when reheating it in the evening.
Results:
The flavor was amazing, and just spicy enough. I think I would like to add spinach next time for enhance the color and health factor.
Experiment Day 5: Friday
At last! I decided it was Burrito Friday. I kind of thought up the recipe on my own from watching them made at Moe’s Southwest Grill! In the morning, I chopped up all my ingredients and cooked the meat and put the burritos ready when we got home.
Steak Burritos
- 1 lb beef steak, thin sliced, cut to 1 inch pices
- 1 teaspoon cayenne pepper
- ½ teaspoon cumin
- ½ teaspoon salt
- ½ teaspoon black pepper
- 1 small onion, diced
- ½ cup mushrooms, sliced
- ½ red pepper, diced
- 4 large tortillas
- 1 cup cooked rice
- Fresh lettuce, chopped
- Cheddar cheese
- Salsa
- Sour cream
In a small bowl, combine cayenne, cumin, salt, and black pepper. Rub spice mixture into meat.
Heat a large frying pan over medium heat. Add spiced beef to frying pan. Brown for about 5 minutes on both sides, or until cooked though. Remove and set aside.
Add onion to pan, and sauté until translucent, about 5 minutes. Add mushrooms and red pepper and sauté another 5 minutes or so. Add beef back to pan and heat through.
Meanwhile, place tortillas on a microwaveable plate and cover with a damp paper towel. Warm in microwave for 45 seconds.
Layer rice, beef, vegetables, and cheese on each tortilla, then roll up burrito-style. Serve with salsa and sour cream.
Discussion:
The steak tasted so delicious! I think if I had spiced the meat the night before, it would have been even better, so I might try that next time. The thin cut steak, which was designated on the package as for a stir fry, worked perfect. You can add whatever vegetables you like to your burrito. I just happened to have mushrooms and red peppers.
Results:
Perfect! There is no picture because we chowed them down. The only thing they were missed was beans. I like black or pinto… maybe even pinto. That will also be a priority next time.
I'll let you know how next week goes...
November 08, 2009 - by Jennifer Derri
This is a quick pasta dish that I served with chicken cutlets for a delicious and easy Italian meal! I found this recipe at The Bake-off Flunkie, and it is exactly the kind of quick dinner recipe I have been in need of lately.
With an internship, schoolwork, and graduate school applications (in addition to dinner) on my plate, this is an exciting semester! Lately, my husband and I haven’t been sitting down to dinner until after nine o’clock, and often times, I will admit, that dinner is take-out. Tsk, tsk, I know. Not only is this expensive, it usually doesn’t taste great, and it is horrible for my diet!
So, in an attempt to combat this quickly forming bad habit, this week I will be undertaking a student cook experiment: I will be cooking our evening meals in the morning! This idea is inspired by the advice of some of my co-workers, who claim waking up thirty minutes earlier in the morning is totally worth arriving home at night to find dinner waiting. Please check back for the results of this experiment next week!
- 1 cup chicken broth
- 3 large tomatoes, diced
- 3 cloves garlic, minced
- 1/4 teaspoon red pepper flakes
- 1 package ravioli, frozen
- 2 cups spinach, coarsely chopped
- 1/4 teaspoon sugar
- Salt and pepper to taste
- Parmesan cheese
Combine chicken broth, tomatoes, garlic, and red pepper flakes in a sauce pan, and bring to a boil. Add the ravioli. Cover and cook about 7 minutes, stirring occasionally. Uncover and cook for an additional 5 minutes or until the ravioli is done.
Stir in the spinach and sugar; cover and cook for 2 minutes, stirring occasionally. Remove from heat and let stand, covered, for about 5 minutes. Add salt and pepper to taste. Serve with Parmesan cheese.
Tips from a student cook…
I used frozen ravioli here because I often find it on sale in the grocery store for just a little over a dollar. Perhaps one day I will learn how to make ravioli from scratch, but for now, the frozen variety will do. I was surprised to sugar in the ingredients list. Who knew it would bring out the sweetness of the tomatoes so beautifully. The original recipe uses canned diced tomatoes, but I find buying fresh tomatoes is cheaper. The only additional requirement is chopping. In my early morning cooking experiment this week, I plan to do all prep work like this the night before so that I can just throw everything together the next morning. This may take time, but it also saves money, tastes fresher, and is healthier!
November 05, 2009 - by Jennifer Derri
I am from the Cheesehead-land. Yes, the great country of Wisconsin. Naturally, then, I take to the Mexican variety of the cheese sandwich, the quesadilla! For brunch last Sunday, my husband and I enjoyed this personally invented breakfast version!
In a large skillet, fry eggs on each side until golden, and set aside. After frying eggs, place tortilla in the large skillet. Place fried egg on tortilla. Layer cheese and chorizo on top of one side of the eggs, and fold the tortilla in half. Cook over medium heat until cheese is melted. Serve with fresh salsa!
Tips from a student cook…
I usually fry my eggs in a small skillet, so they are fluffier, but for the quesadilla, it was better to have them thinner. I didn’t put a suggested amount of cheese in the recipe mostly because I can’t remember exactly how much I used, but also because you might like more or less (especially if you are not a Wisconsinite!). I probably used somewhere between a quarter and half cup. I decided to use sausage after getting this really good chorizo burrito at Gonzo’s (the Mexican restaurant on Nassau Boulevard). The chorizo I used was cured. If you use fresh sausage in place of the chorizo, try sautéing the sliced rounds with diced onion for more flavor!
October 14, 2009 - by Jennifer Derri
Welcome to autumn. I felt a chill in my bones today. I knew it was time to make a soup. I decided I wanted to make just a simple vegetable soup, which is a pretty easy. Thanks to a recipe at the food blog Nooschi and Planet Green’s Soup of the Week, I found inspiration that really warmed me up. Don’t forget crackers!
-
2 tablespoons olive oil
-
1 medium onion, finely chopped
-
2 garlic cloves, finely chopped
-
2 stalks celery, chopped
-
2 medium carrots, chopped 6 cups of water
-
2 tablespoons tomato paste
-
3 small Roma tomatoes, chopped
-
1 cup green beans, chopped
-
6 cups water
-
1/4 cup of curly parsley, finely chopped
-
Salt and freshly ground pepper
Heat oil over medium heat. Sauté onion and garlic until translucent then add celery and carrots. Sauté until tender, about 20 minutes.
Push vegetables to one side of pot. Add tomato paste to cleared area. Stir constantly until paste begins to caramelize, about 2 minutes. Combine with vegetables.
Stir in tomatoes and green beans. Add water and parsley. Season with salt and pepper to taste. Simmer, covered, until all vegetables are tender, about 30 minutes.
Tips from a student cook…
This soup can help you use up a ton of vegetables! I had green beans, that’s why added them here, though they were in neither of recipes I pulled other ideas from. I wanted a tomato based soup, and I love the idea to carmelize the tomato paste from Planet Green’s Soup of the Week. I couldn’t make a real minestrone because I was missing other ingredients. I also would have loved to add barley as the recipe at Nooschi suggests, but I didn’t have that either. In the end, though, I do have a flavorful, comforting, and perfectly autumnal vegetable soup!
September 28, 2009 - by Jennifer Derri
Here is another traditional Ghanaian dish! This meal is best enjoyed on a Sunday afternoon. Most people in Ghana flock to restaurants and “chop bars” after Sunday church services to enjoy Nkatenkwan, a hearty peanut (groundnut, as it is known in Ghana) soup. Rice as well as boiled black eyed peas, hard boiled eggs, or steamed greens are also sometimes served with the soup, and along with your large bowl of food, you will also be served a large bowl of water and a bottle of liquid soap with which to wash hands, since the best way to eat soup in Ghana is sucked from your fingers! Complete the meal with a tall Star beer (the local brew), and you will be satisfied for the rest of the day!
I have described below the cooking process, which I first learned one Sunday afternoon with one of my host moms, Ma Lucy, while I was in Ghana as an exchange student. It’s difficult to give specific measurements for all the ingredients, since I’ve never seen any Ghanaian cook using measuring cups, but when my husband and I decided yesterday it was a good Sunday to enjoy a good soup, I tried to make record some precise observations…
Cut up one whole chicken (do not debone or remove skin). Place chicken pieces in large stock pot over medium-high heat. Season with salt and cayenne pepper. Add 1 clove chopped garlic, 1 tablespoon minced ginger, and about half of one small sliced onion. Steam chicken for 10 to 15 minutes, or until browned.
Meanwhile, in a medium bowl, mix a little less than 1 cup of pure peanut paste (natural peanut butter with no additives) with a little more than 1 cup water, until it has the consistency of a thin yogurt.
At the same time, combine 1 medium tomato, 1 medium red onion, 2 cloves of garlic, and 5 dried chili peppers in the blender. Blend to a smooth consistency, then add 3 oz tomato paste to thicken and give color.
Pour tomato base over chicken. Use 1 cup of water to rinse out blender and add to soup. Add a dash or more of salt. Bring to a boil, and let simmer for 10 minutes.
Add diluted peanut paste to soup. Use 1 cup of water to rinse out bowl and add to soup. Add 4 to 5 additional cups of water. The soup should be very thin, and have a light tan color. Add salt to taste.
Bring soup to a boil, and let simmer for another 30 to 40 minutes, partially covered. As the soup boils, it will turn a darker brown, and some oil will rise to the surface. Continue to boil until this happens, and then for another 30 to 40 minutes after that. Serve in large bowls with steamed rice!
Tips from a student cook…
When I first learned to cook this dish with my host mom, we used a mortal and pestle instead of a blender. We also cooked over a coal pot that we continuously had to be fanning in order to maintain a consistent heat. That was a lot of work, but of course, worth all the extra energy! Sometimes it is hard to cook traditional food outside of a traditional area. You never have quite the same ingredients, nor the atmosphere. Somehow in Ghana, even the hot sun is an essential ingredient, and without it, it’s not quite the same. But it still can be done!
The most important thing for this dish is to find a good peanut paste. Peanut butter doesn’t work as well, but you can use a natural peanut butter, one that has that oil floating on the top. We used a peanut paste that we found at the African grocery on Meacham Avenue in Elmont.
The pepper is also a very important ingredient. We used a handful of fiery red dried chili peppers, but you could also use finger peppers, or the small round peppers that I have seen labeled in the grocery store as Jamaican hot peppers. This soup is best served spicy!
September 28, 2009 - by Jennifer Derri
I may have discovered this idea a little too late, since it would have been a perfect summer treat. Then again, I eat ice cream year round, and these little guys are nearly just as good! When frozen, the inside of the grapes turns to a sort of sorbet. I am not kidding! I can't stop eating them.
All you need is a bunch of grapes. There is no need to remove them from the stems. Simply place them on a freezable tray, and freeze overnight. When you remove them from the freezer, you dont have to thaw them for more than a minute.
I have tried red and purple grapes, and both were delicious. I think the red were a little more juicy. Green grapes would be also be a bit tangier. They also are fun to use as ice cubes in your favorite drink!